How to Migrate Exchange 2013 to 2016 Server via Admin Suggested Steps!


Overview: This technical guide is crafted for Exchange users where they will find a detailed procedure to migrate Exchange 2013 to 2016. The article will cover everything from prerequisites for Exchange Server 2016, the installation method of Exchange 2016 to the ultimate solution for mailbox migration.
Microsoft introduced the 2016 edition of the Exchange server, which can be closely integrated into other products such as Office 365, SharePoint, and other applications. Though Exchange 2016 shares a similar interface as Exchange 2013, these advanced features make it more reliable than the 2013 server.
What’s New in Exchange Server 2016? Benefits of Migrating from Exchange Server 2013 to 2016
Do you know why users want to migrate Exchange 2013 to 2016? If not, then go through this section and know the advantages behind this transition –
- Built-in Malware Protection – In Exchange 2013 and 2016, a feature protects against malware. It scans emails sent and received within your organization for harmful content. With Exchange Server 2016, you get a more improvised version of malware protection that’s the reason many organization migrate Lotus Notes to Exchange to gain the benefit.
- Mail Flow Changes – When upgrading from Exchange 2010, there are changes in how emails flow. Mail routing now considers Active Directory site boundaries and DAG boundaries. The maximum message size for sending and receiving has been increased from 10 MB to 25 MB in Exchange Server 2016.
- MAPI over HTTP – In Exchange Server 2016, Outlook now uses MAPI over HTTP as its default way to talk to Exchange. If your email client doesn’t support this, it will use RPC over HTTP instead.
- Improved Searching – The Exchange’s search capability got better from 2013 to 2016. That’s why users want to migrate Exchange 2013 to 2016. Plus, the search is built on the SharePoint Foundation search. There’s also Compliance Search for e-Discovery, which allows searching up to 10,000 mailboxes at once.
- Enhanced Collaboration – In Exchange 2016 OWA and SharePoint 2016, you can share documents from OneDrive for Business rather than attaching them to emails. You can also edit or view the documents.
- Growing Archives – Archive mailboxes expand when they reach 50 GBs. When the mailbox hits this size, another archive mailbox is automatically created and linked, forming a chain of mailboxes that work as one. The content spreads across these mailboxes for balanced storage.
- Improved Data Loss Prevention (DLP) – DLP, introduced in Exchange 2013, safeguards sensitive data using transport rules. Exchange 2016 adds around 80 new conditional types, allowing for better notification when a rule is violated.
- Outlook on the Web – This is the web version of Outlook, previously called Outlook Web App (OWA). It’s updated for better mobile and tablet support. Changes include an improved calendar, enhanced search, new themes, and an inline video player.
- Managed Store – Existing Exchange 2013 users know about Managed Store changes. For Exchange 2010 users, this is new. Managed Store replaces. Microsoft.Exchange.Store.Service.exe and Microsoft.Exchange.Store.Worker.exe. It’s written in C# and collaborates with the replication service. Managed Store is integrated with the Search Foundation, enhancing Exchange’s search capabilities.
That’s why many businesses using dedicated servers want to migrate Exchange Server 2013 to the 2016 Exchange version. For that, performing a data migration is the only solution. However, executing the same is quite a complex process.
Know the Stepwise Instructions to Migrate Exchange 2013 to 2016!
So, you need to follow various systematic steps to accomplish a successful migration.
And, it goes like this;
#1. Prepare Environment for Exchange 2013 to 2016 Migration
There are a few things you need to verify before moving forward with the migration procedures. The first thing is to ensure that you have a suitable environment that matches the system requirements to perform the migration.
It’s important to check that all the hardware and software requirements are met. So, before you begin you must ensure the parameters like RAM, CPU, and Storage space available for the server are sufficient.
The primary system requirements required to migrate Exchange 2013 to 2016 are as follows:
Hardware Requirement
- Your processor should be an Intel 64-bit processor or AMD AMD64 platform.
- A minimum of 8 GB of storage space is required.
- File size: Maximum 32 GB physical RAM
- You need a disk space of 30 GB on the drive. 200 MB on the system drive and 500 MB for the message queue data database.
Software Requirement
- Windows Server versions 2012, 2012 R2, or 2016 are required.
- You need to make sure you have .NET Framework 4.8, 4.7.2, 4.7.1, or 4.6.2
- Supported clients: Microsoft 365 Apps for enterprise, Outlook 2019, Outlook 2016, Outlook 2013, Outlook 2010 SP2, Outlook 2016 for Mac, Outlook for Mac for Office 365.
Other Requirements to Make Migrate Exchange 2013 to 2016 a Brezze!
- Drive: DVD-ROM Drive
- File Format: NTFS for System partition, Exchange binaries, Exchange Diagnostic logging files, transport database files
- Screen Resolution: 1024*768 pixels
- Mailbox and Edge Transport Server Roles: Windows Server 2012, 2012 R2, & 2016 Standard or Data Center
Along with the above requirements you have to make sure that the existing client list must support Exchange 2016. Otherwise, you need to upgrade them for successful Exchange mailbox 2013 to 2016 migration.
#2. Prerequisites to Install Exchange 2016
After preparing your environment for migration, you need to install Exchange 2016 to proceed. But, before you migrate Exchange 2013 to 2016, make sure you have appropriate permissions and that the below prerequisites are installed.
- Microsoft .NET Framework version 4.5.2
- Windows Management Framework version 4.0
- Runtime version for Microsoft Unified Communications Managed API 4.0
- Necessary features for Windows
#3. Detailed Installation Steps for Exchange 2016
Installing Exchange 2016 is not an easy task, to begin with. So, carefully follow the given step-by-step procedure for the installation, and then only we can migrate Exchange 2013 to 2016.
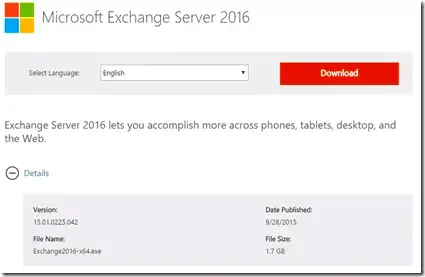
Step 1. Go to the official site of Microsoft and download the Exchange Server 2016. Then, extract the setup file.
Step 2. To start the installation of the Exchange server, run the setup.exe file.
Step 3. Next, the ‘check for updates’ screen will appear. After that, you have to select Connect to The Internet >> Check for Updates >> Next.
Step 4. If any new updates are available then download them and move forward.
Step 5. The ‘Setup’ will copy the files and start the installation process.
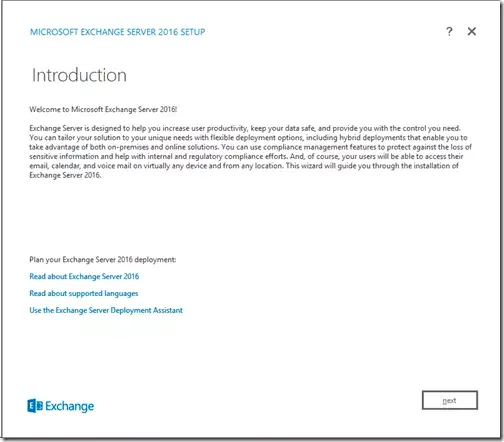
Step 6. After that, the introduction page will appear. Here, click Next.
Step 7. Next, accept the terms and conditions on the License Agreement page and tap on Next.
Step 8. Then, under the Recommended Settings section, select ‘Use recommended settings’ and click Next.
Step 9. Now, in the Server Role Selection window, tick the Mailbox role checkbox and hit Next.
Step 10. After that, specify the location to install the software. It’s up to you whether you want to install the software at the default location or a different location, this will not affect migrate Exchange 2013 to 2016 procedure.
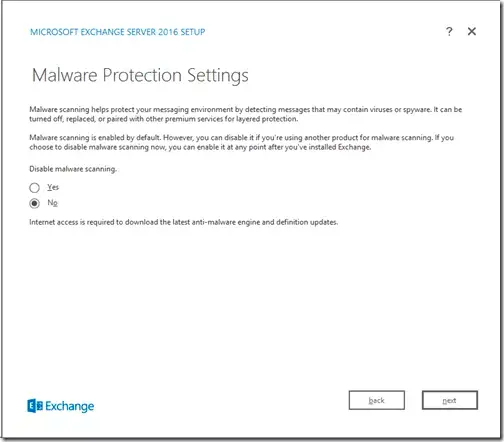
Step 11. Under Malware Protection Settings, select Yes or No to disable malware scanning. And, click Next.
Step 12. Then, the Setup will start carrying out a Readiness Check on the system and simultaneously configure the prerequisites.
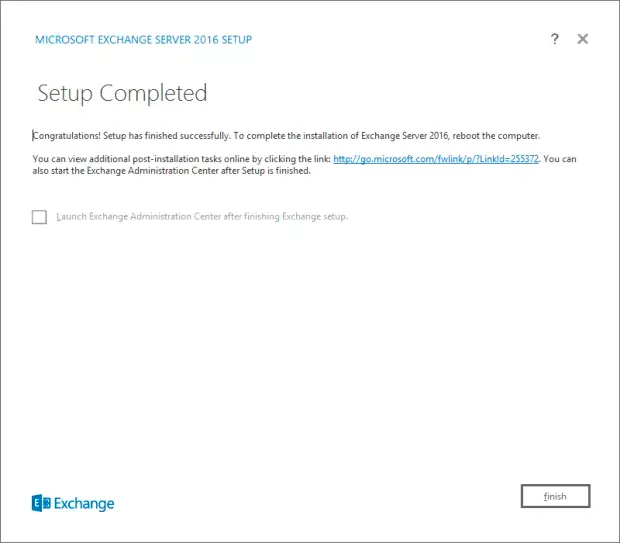
Step 13. Once the Setup process is completed, a window will pop up saying Exchange Server 2016 has been successfully installed.
Step 14. After receiving the Setup Completed message, you can click on Finish to end the installation process.
#4. Configure Service Connection Point
The final setup step to migrate Exchange 2013 to 2016 is to configure the Service Connection Point. It is an object of Exchange in Active Directory directing domain-joined Outlook clients to a URL.
The server’s fully qualified domain name serves as the characteristic by default. To prevent Outlook clients from connecting to it and receiving a certificate warning, this needs to be modified right away.
The warning is generally issued when they are presented with the default self-signed certificate installed by the Exchange Server. So, the Service Connection Point configuration is mandatory for the Exchange 2013 endpoint.
#5. Now, Learn the Approaches for Exchange 2013 to 2016 Migration!
While there are various solutions available to migrate Exchange 2013 to Office 365, finding the best solution for On-Premise to On-Premise migration can be more challenging. That’s why we are here with four reliable solutions to make this job a breeze!
So what are you waiting for, just go through the same thoroughly & migrate Exchange 2013 to 2016 –
#Solution 1. Use EAC for the Migration
If you have proper admin credentials, then you opt for this solution and initiate the task by following these steps –
Step 1. Access Exchange Admin Center via URL; log in as administrator.
Step 2. In the left pane, select Recipients, then choose Migration.
Step 3. Click Add, then select Move to a different database.
Step 4. Use search or browse to select mailboxes for migration.
Step 5. Click Next to confirm your mailbox selection for migration.
Step 6. Name the migration task clearly for easy future identification.
Step 7. Click Browse to select the target database on Exchange 2016.
Step 8. Review the selected target database for accuracy and correctness.
Step 9. Click Next to proceed with the migration setup process.
Step 10. Uncheck “Automatically start the batch” for manual initiation later.
Step 11. Click Finish to migrate Exchange 2013 to 2016 successfully.
#Solution 2. Hybrid Migration
A hybrid migration involves a mix of on-premises & cloud Exchange environments. Follow these steps to set it up correctly:
- Install Exchange 2016 alongside Exchange 2013.
- Download HCW from Microsoft.
- Run the wizard, entering your Office 365 admin credentials when prompted.
- During HCW setup, choose to configure your hybrid deployment (full hybrid is typical for shared free/busy and mailbox migrations).
- Use Azure AD Connect to sync your on-premises Active Directory with Azure AD.
- In EAC, go to Recipients > Migration.
- Click Add > Move to Exchange Online and follow the prompts to select users.
To monitor the transition follow these scripts:
Get-MoveRequest | Get-MoveRequestStatistics
#Solution 3. Opt for PowerShell Method to Migrate Exchange 2013 to 2016
Using PowerShell can simplify mailbox migrations, especially for bulk operations –
- Our very first step is to ensure it’s correctly installed and accessible, then create a Target Mailbox Database (if needed):
New-MailboxDatabase -Name "DB2" -EdbFilePath "C:\DB2\DB2.edb" -LogFolderPath "C:\DB2\Logs"
- Move Mailboxes Using PowerShell:
Get-Mailbox -Database "OldDB" | New-MoveRequest -TargetDatabase "DB2"
- Monitor Move Requests:
Get-MoveRequest | Get-MoveRequestStatistics
- Complete Move Requests:
Get-MoveRequest -Status Completed | Remove-MoveRequest
Solution 4. Expert-Recommended Smart Solution!
After carrying out all the above steps successfully, it’s time to move your mailboxes from Exchange Server 2013 to 2016. If you want to migrate Exchange 2013 to 2016 simply and easily then you can check this out i.e. Exchange Migration Tool.
The tool is loaded with many advanced features that make the entire migration process a piece of cake. For instance;
- It migrates emails, contacts, calendars, and tasks to the target Exchange server environment.
- It is compatible with All Exchange Server Version after 2010, such as 2013, 2016 and 2019.
- The tool allows you to perform a customized migration with the help of advanced features.
- Also, you can apply a date & time filter to migrate the data from a specific time duration.
- The Auto Generate CSV option lets you migrate multiple sources to multiple destination mailboxes.
The above are just a handful of features and there’s more to it.
Anyway, the data transfer process is also very simple. Only five steps and you are good to proceed with moving your mailboxes.
Step-By-Step Guide to Migrate Exchange 2013 to 2016 Quickly
Step 1. Download, install, and run the software on your computer. From the main screen of the software, you have to choose the migration platform. Choose Exchange as the source and destination platform.

Step 2. Coming to the workload selection, choose the required mailbox items and apply the date filter for selective data transfer.

Step 3. Moving to the next step, choose the respective version of the Exchange Server version, from the drop-down menu. Provide all the necessary details. Now click on the validate button to validate the required permissions and click on the Next button.

Step 4. In the destination tab provide the required details and click on the validate button. Click on the next button.

Step 5. Add users, in order to do so, you can create a mapping between the source Exchange 2010 to Exchange 2016 or 2019.

Step 6. Select the required user accounts and click on the start button to migrate Exchange 2013 to 2016.

That’s it! Your entire data is migrated into your new Exchange. From now, one can access there entire information from their new account hassle-free. Despite that, for some reason, if you want to proceed with the Exchange On-Premise to Office 365 migration, then in that case also, we can help you with our other stepwise guide.
User Testimonials for the Software
I just wanted to say that this is an amazing product. I was looking for an option to migrate from Exchange 2013 to 2016 and found this product. The built-in advanced features help make this process easy and are a great time saver!
We were looking to migrate from Exchange Server 2013 to 2016. We tried a few different utilities but this one was hands down the easiest to use. It’s a well-designed application that has helped us save a lot of time and money with its efficient built-in features.
We opted for this prime software to migrate Exchange 2013 to 2016. The advanced set of features available in this application is just a class apart. I would recommend it to anyone who wants to migrate Exchange Server 2013 to 2016.
Frequently Asked Queries
Q. Is there any limit on the number of mailboxes that I can migrate using this solution?
A. No, you can migrate ‘n’ number of mailboxes from Exchange 2013 to Exchange 2016. This utility does not impose any restrictions on the number of mailboxes that you can migrate.
Q. Do I need to have a healthy Exchange Database file containing mailbox data for migration?
A. No matter if you have a healthy or damaged EDB file, this advanced application has a file scanning option that detects and fixes corruption issues in the database.
Q. We have a couple of Exchange public folders in the Exchange Server that we need to migrate Exchange 2013 to 2016. Does this application support public folder migration?
A. No, this Exchange 2013 to 2016 migration software enables users to migrate complete Exchange 2013 data including emails, contacts, calendars, etc. Additionally, it ensures that all your crucial data is migrated without losing a single bit of data.
Q. Do I need to perform all the prerequisites mentioned in the above section to run this software?
A. Yes, all the steps for preparing Exchange Server 2016 for migration are mandatory before proceeding with the process. Once all the prerequisites are fulfilled, you can then start migrating Exchange 2013 to Exchange 2016.
Bring it All Together!
To improve business operations both internally and externally, organizations are considering the option to migrate Exchange 2013 to 2016. Plus, to help them perform a smooth migration, this tech guide explains a step-by-step procedure. Hence, follow the steps and try the professional tool to move your Exchange database with 100% precision.
