Import Outlook 2007, 2010, 2013 Calendar to Office 365 – Complete Guide!


Struggling to import Outlook calendar to Office 365? You’re not alone! Many users face this challenge, but don’t worry—we’ve got you covered with a step-by-step guide to complete this task in a few minutes!
On one side when technology is upgrading gradually, it is still a huge challenge for users to move Outlook calendar to Outlook 365. Without any doubt, Microsoft Outlook is one of the widely used platforms. It is used in both small as well as large enterprises to meet business requirements.
However, the popularity of Office 365 is also unavoidable. It comes with many handy applications, which are very familiar among users like PowerPoint, MS Word, Outlook, Excel, etc. Therefore, sometimes users may wish to migrate Outlook calendar to Office 365.
Let us Take a Real Example –
“I have been using Microsoft Outlook for a long time, while my father is using Office 365. Sometimes, due to the unavailability of an internet connection, it is impossible to access the older data which includes calendars. However, my father can use the data at any time even from any device. Apart from this, he can even use the calendar events and updates anytime. In our area, internet connectivity often creates hurdles in between work. That’s why I need to import Outlook calendar to Office 365. Now, the challenge I am facing is how to add Outlook Calendar to my Office 365 account. I have searched for a reliable method for the same, but all my efforts have been in vain. Now, please guide me on the same to execute this task simply and quickly.”
As we’ve seen, it is not as easy to perform this task. That’s why we’ve introduced the following methods to help. However, before that let’s first explore some key reasons behind this transition.
Factors Responsible for Migrating Outlook Calendar to Office 365!
- Certainty over costs upfront
- To keep the business agile
- To enhance communication
- Boost employee productivity
- To streamline IT operations
- For powerful collaboration
- Scalability and flexibility
- Robust security/ compliance
How to Import Outlook Calendar to Office 365?
To import your Outlook calendar to Office 365, you can use one of several methods: Export the calendar from Outlook and import it to Office 365, use an automated tool to migrate PST files, share the calendar via email, or sync the calendar through iCloud.
So, don’t waste time—read through the sections below and choose the method that works best for you.
Method 1. Outlook Desktop App
This is the straightforward method, and we divide this procedure to transfer Outlook 2007/ 2010/ 2013 calendar to Office 365 into two major steps i.e. Export/Import:
Phase 1. Export Calendar from Outlook
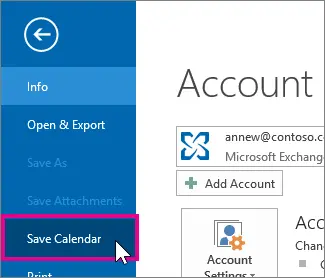
Step 1. Launch Outlook > Calendar, and choose the calendar for export.
Step 2. Click File >> Save Calendar.
Step 3. Now, you can either use the default name or enter a new name for the iCalendar file in the File Name section.
Step 4. After this, you will get a summary displaying the date range, calendar name, and detail level next to More Options. If the summary report is fine then, go to point no. 7 otherwise, continue with point no. 5 and Import Outlook Calendar to Office 365.
Step 5. Click on More Options.
Step 6. Hit the Date Range arrow, and select the amount of calendar data you need to include in the iCalendar file. Or, directly click on Specify dates to enter a particular date range.
Note: If you are selecting a large time interval or select a whole calendar then, it will generate a large iCalendar file, which may take a long time to create.
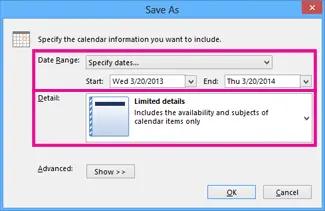
Step 7. Next, click on the Detail arrow and select the amount of detail you need to show.
Step 8. OK >> Save.
Step 9. If your calendar is blank, you will get a prompt to cancel saving the iCalendar file.
Phase 2. Import Outlook Calendar to Office 365
Step 1. Now, log in to your Office 365 account, where you need to shift or move the Outlook calendars.
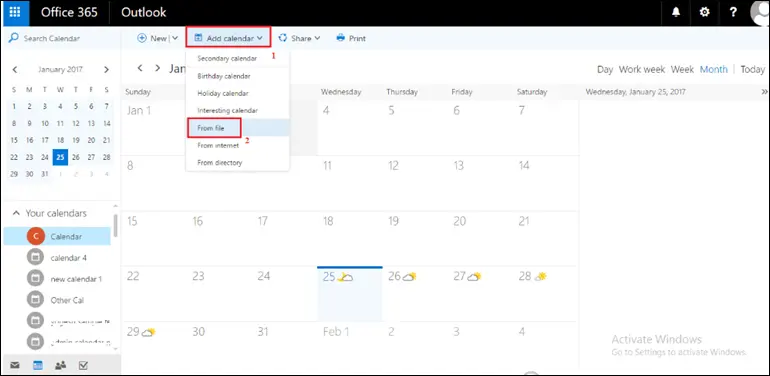
Step 2. After that, go to the Calendar option, and click Add Calendar >> From file.
Step 3. Then, select the iCalendar file that you have exported from Outlook account. After that, store the chosen file by hitting the Save button.
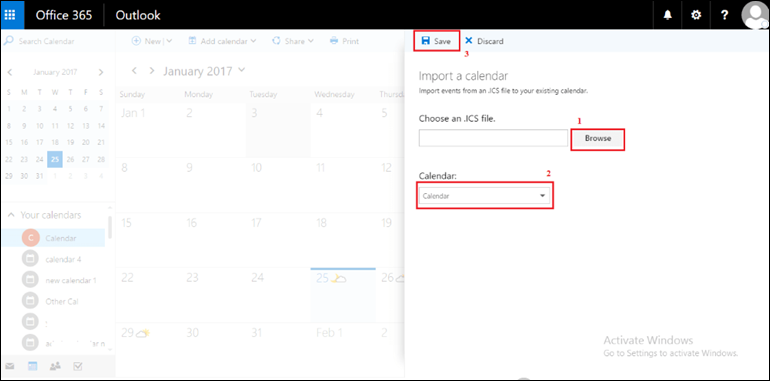
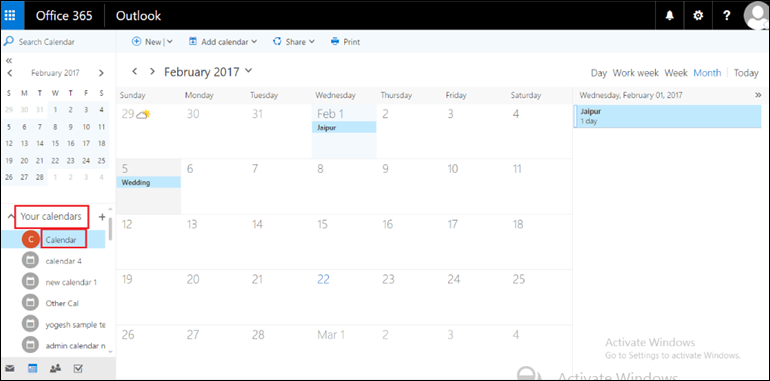
Step 4. Eventually, access the Outlook calendars from your Office 365 account from the Your Calendars section.
So, after completing this task, you can access your data in your Office 365 account, you can even remove Calendar from Outlook, if don’t want to use it.
Method 2. Most Secure Way to Import Outlook Calendar to Office 365 Quickly!
If you have already exported your calendars from Microsoft Outlook in PST file format, you can use the Office 365 Import Tool to transfer the Outlook calendar to Office 365. This is a quick and efficient way to import PST files to Office 365 account. The solution can migrate all PST data, including emails, calendars, and contacts. Download this utility for free on your PC and take advantage of its powerful features i.e.
- Migrate multiple PST files simultaneously
- Choose specific mailbox items for migration
- Maintains original folder hierarchy during transfer
- Selectively migrate data within specific date ranges
- Simple, user-friendly interface for easy operation
- Ensures complete and accurate data transfer
Working Steps to Migrate Outlook Calendar to Office 365 Easily –
Step 1. Begin by selecting the source (Outlook) & destination (Office 365) platform.
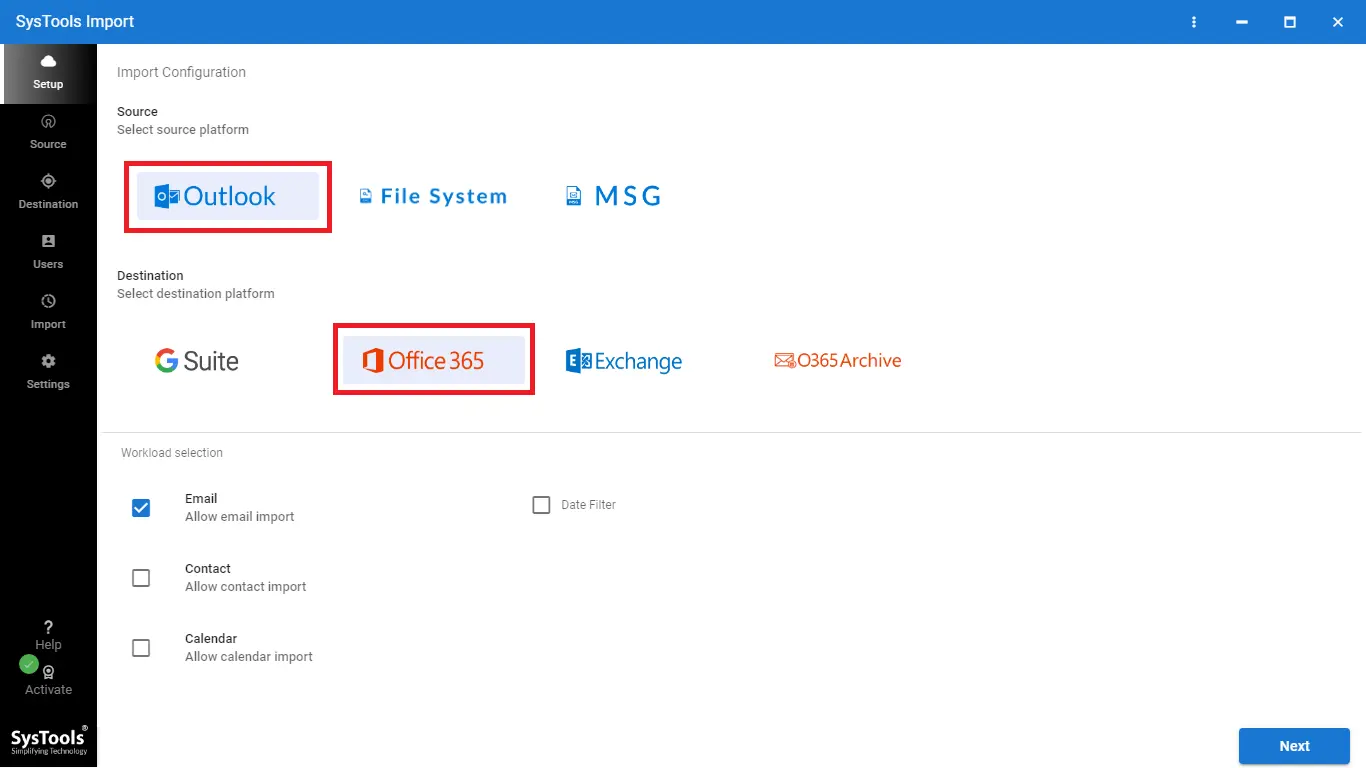
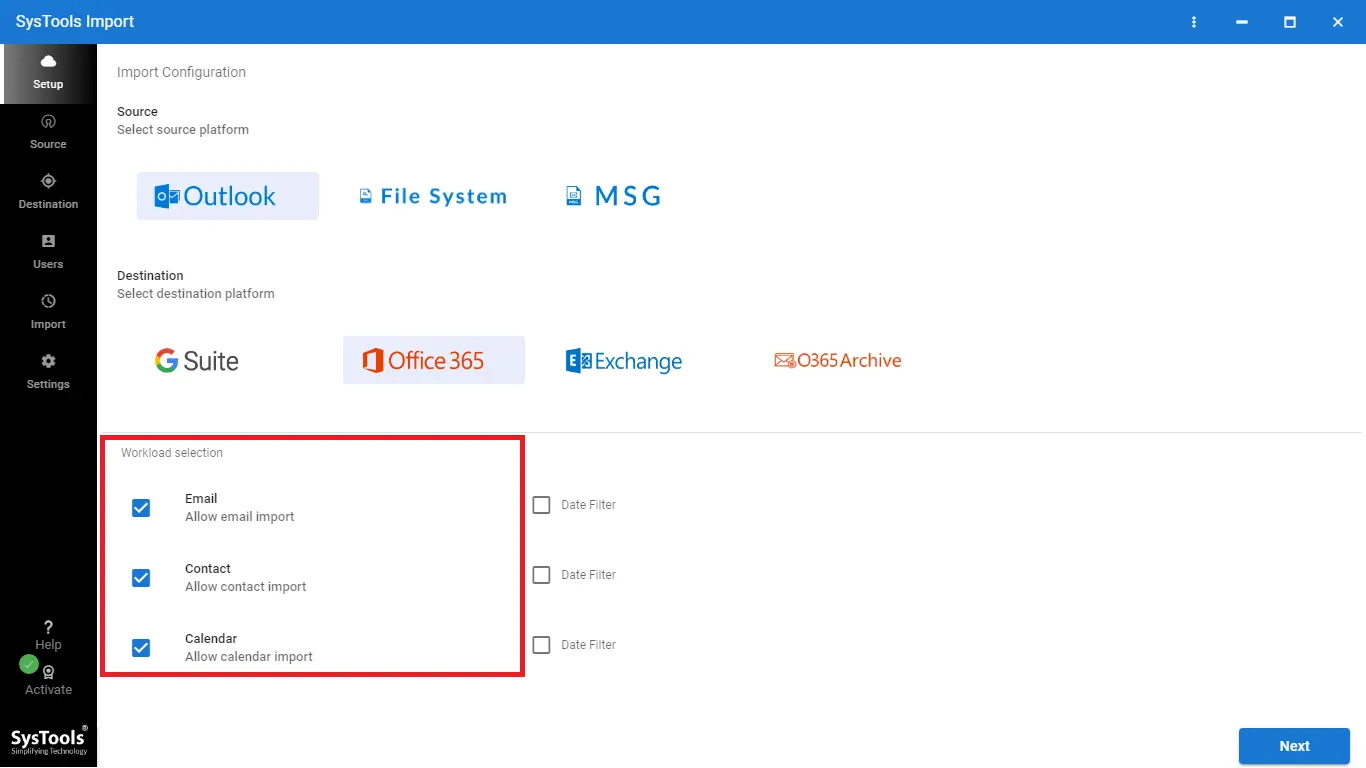
Step 2. Choose the data for the import Outlook calendar to Office 365 process under Workload Selection.
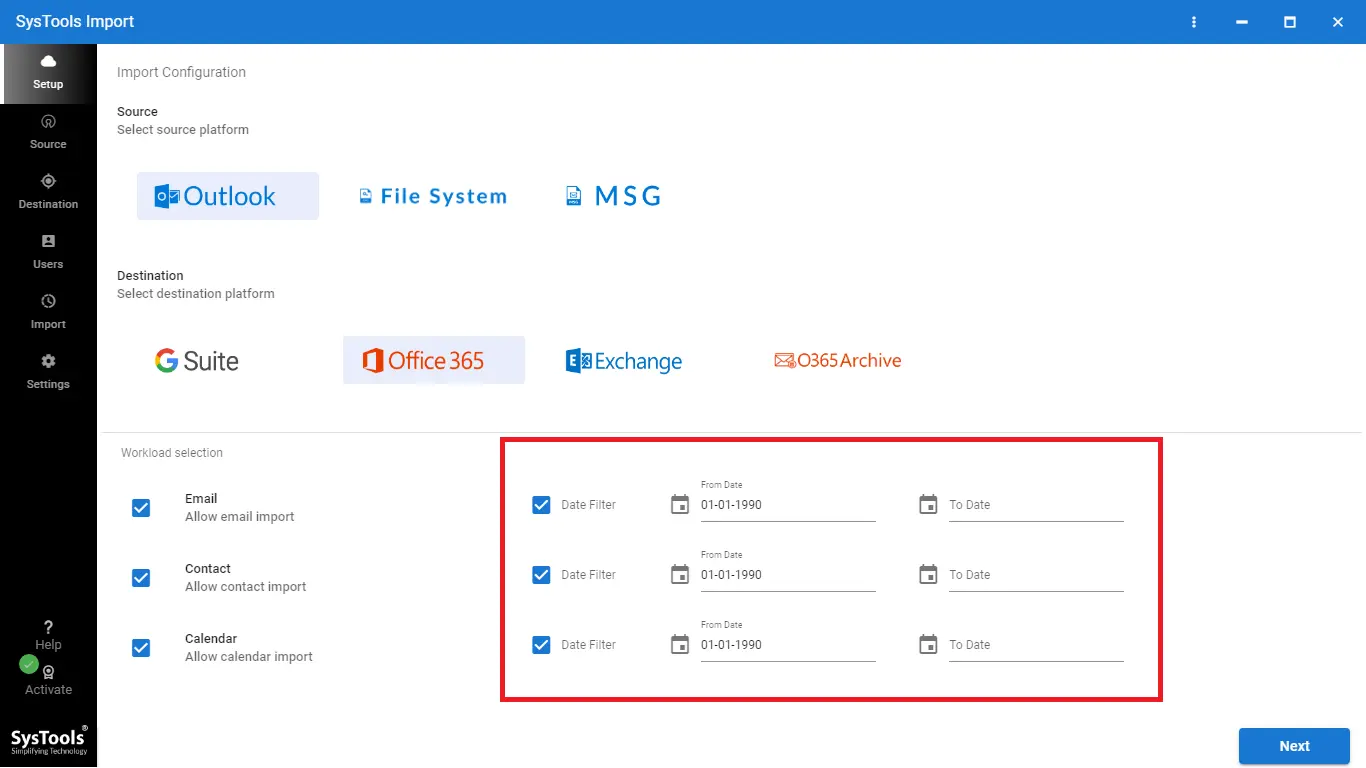
Step 3. Utilize the Date-Range Filter option to selectively import mailbox data based on dates, and then proceed by clicking Next.
Step 4. You will now be directed to the Source screen. Here, pick the folder path where the Outlook PST files are located. Organize PST files in folders named after the respective target O365 email IDs, as follows:
– Create a folder in the root drive, such as E:/PST/user1@domainName.com/ (place all user1’s PST files here)
– E:/PST/user2@domainName.com/ (place all user2’s PST files here)
– E:/PST/user3@domainName.com/ (place all user3’s PST files here)
– And so forth…
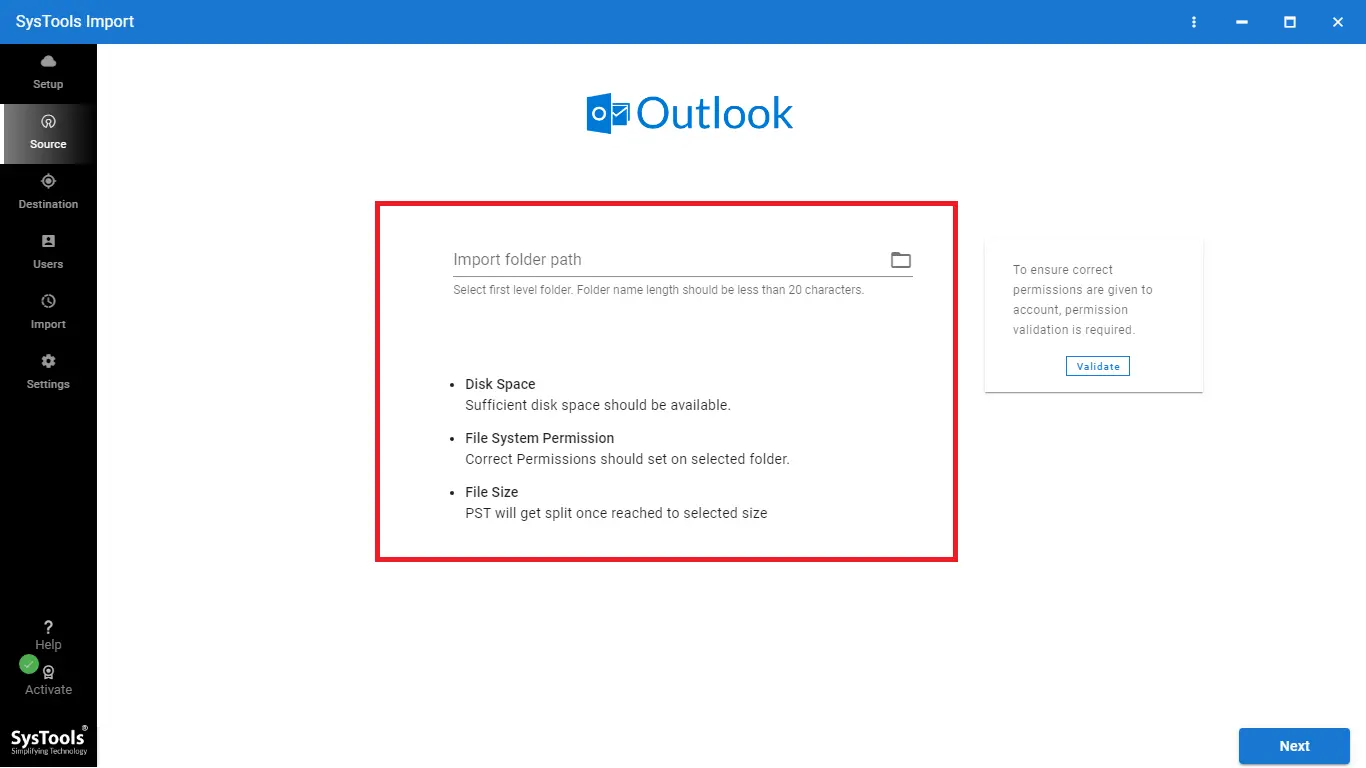
Next, select the folder “E:/PST/” in our tool as the Import Folder Path.
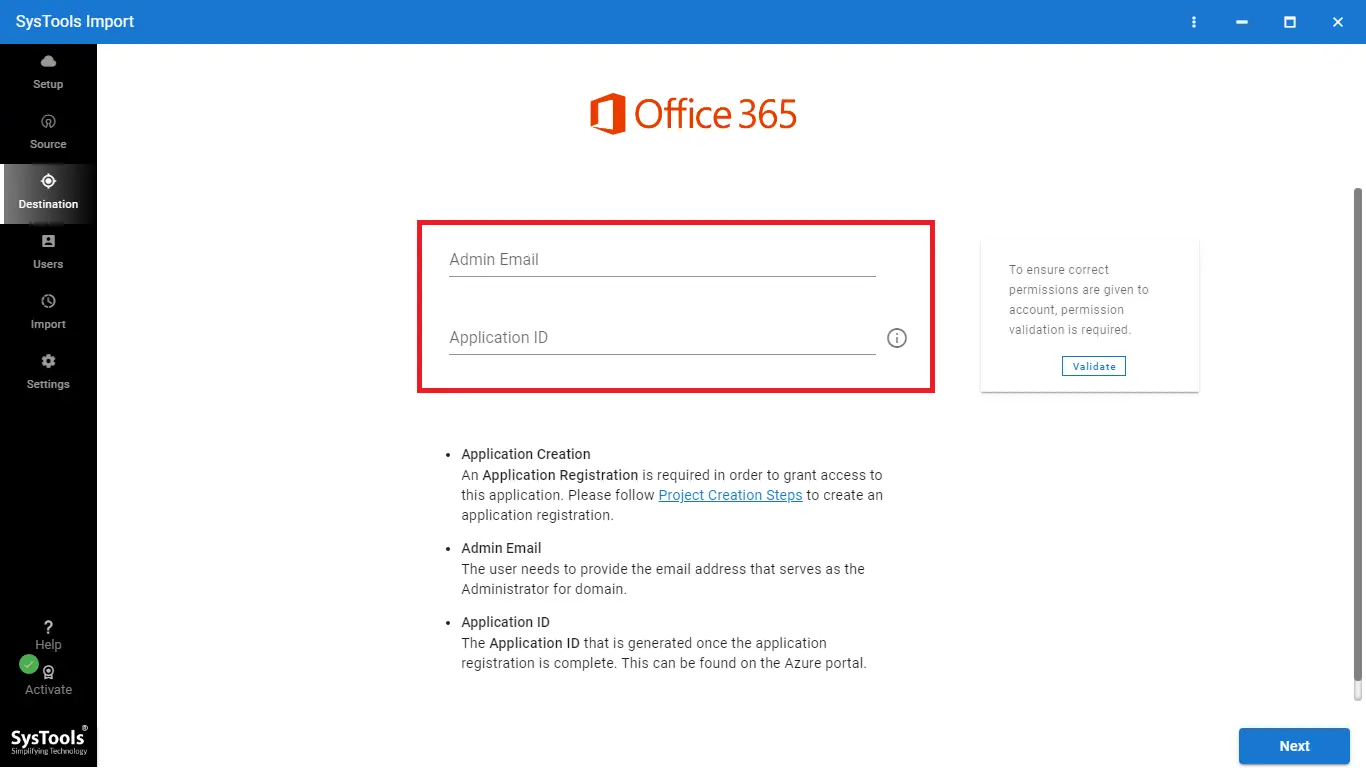
Step 5. Provide the required Admin credentials.
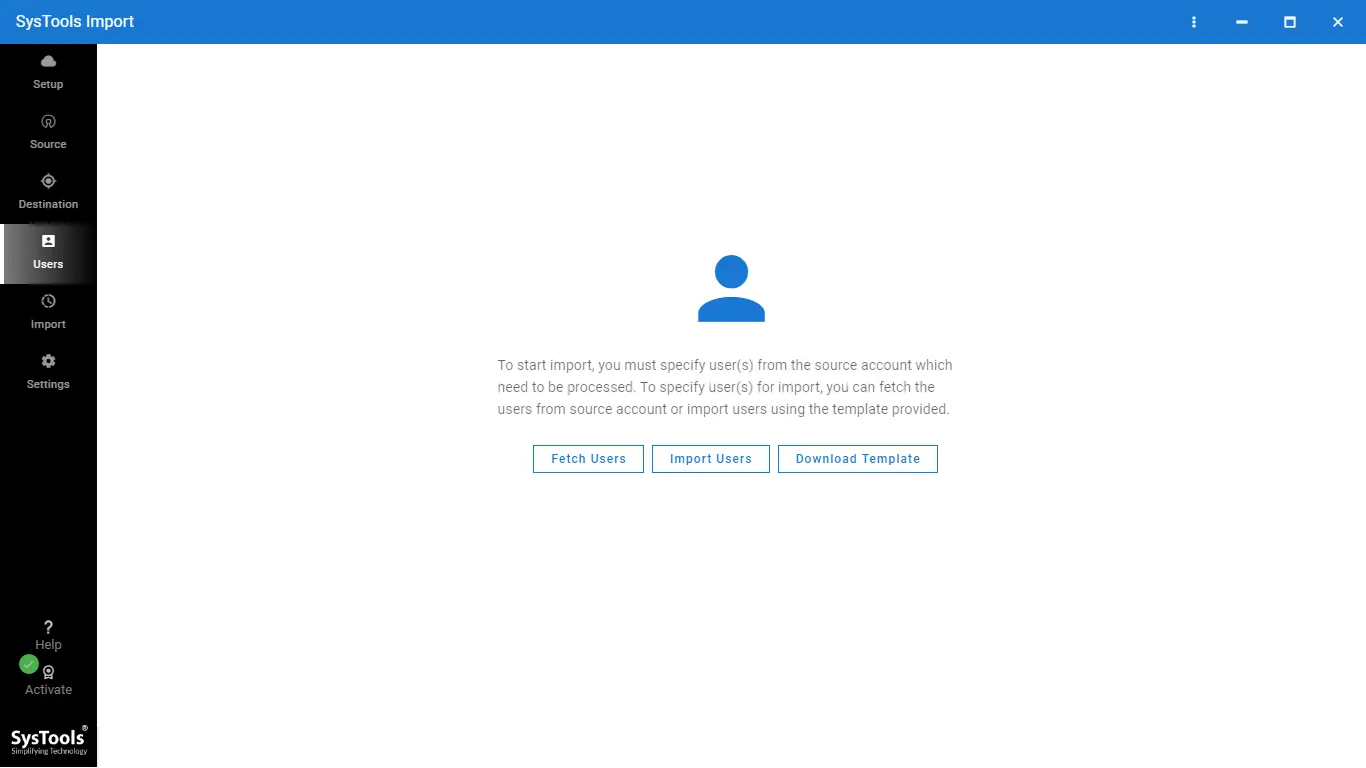
Step 6. For adding users from the source account several options are available i.e. Fetch Users, Import Users & Download Template.
Step 7 Initiate the task by hitting the “Start Import” button.
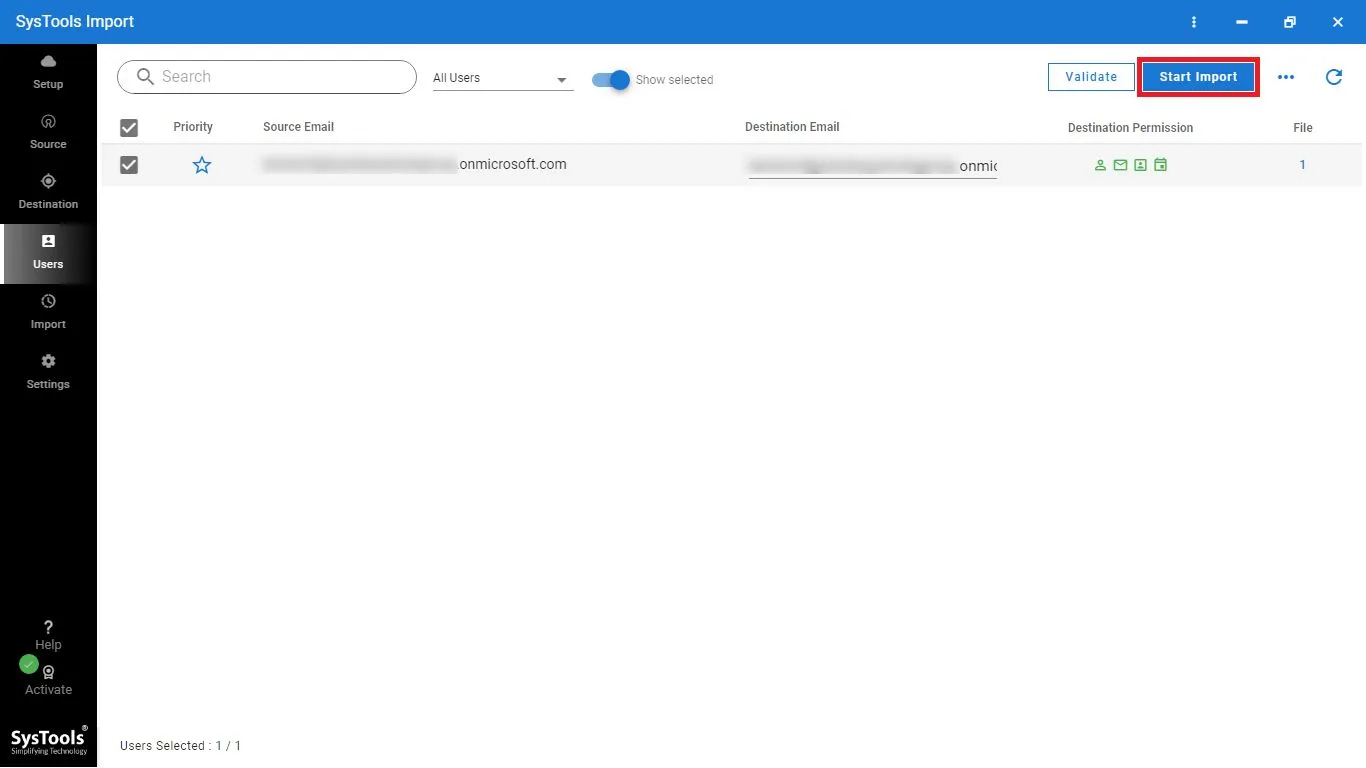
That’s it! You can now access and modify calendars in Office 365.
Method 3. Use Outlook Web App to Import Outlook Calendar to Office 365
For exporting the Outlook Calendar follow the steps from Method 1. Then importing can be done using this solution –
- Open O365 account > Outlook on the web > Calendar.
- Click on Add calendar > From file.
- Select the CSV file > Import.
Method 4. Share Calendar via Email
In this trick, you have to first share your email to Office 365, and then download the Outlook Calendars from it. Sounds interesting! Yes, it is, let’s have a look –
- Run the desktop-based Outlook > Calendar view.
- Then, right-click on the calendar for sharing > Share > Email Calendar.
- Now, select the date range, and send it to the target Office 365 email.
- Open the shared email in Office 365 and download the attached calendar file (.ics).
- Open Calendar in Office 365 > Add calendar > From file > Upload the .ics file.
Done! After the import Outlook calendar to Office 365 procedure is complete you can access the data from your Office 365 account.
Method 5. Use iCloud (if applicable)
Some users use iCloud which may be synced with Outlook. So, for those this option is also available for importing. However, those who worked with iCloud, their Outlook is not synced with it can go through these steps first –
Phase 1 – Sync iCloud with Outlook
- Open iCloud in the Windows system.
- Then, select “Automatically sync iCloud calendars and contacts to Microsoft Outlook”.
- Hit Done, and follow the prompts for setting up Outlook.
For more information – Set up iCloud Calendars and Contacts
Phase 2 – Migrate the Calendar to O365
- Open iCloud > access the Calendar.
- Hit the Share Calendar option > Public Calendar > copy the link.
- Now, within Office 365 > Calendar > Add Calendar > From URL.
- Finally, paste the link there, and start using your calendar in your O365 account.
Final Verdict!
The appreciation and acknowledgment that Office 365 is acquiring have now become one of the major reasons behind its vast use in businesses. Therefore, many Microsoft Outlook users wish to add their calendars to Office 365. In the above guide, we have discussed some methods to import Outlook calendar to Office 365 accounts. Now, it will be no more difficult for users to perform this task.
