Move SharePoint List from One Site to Another – Top 7 Transformative Solutions!


Microsoft SharePoint is indeed a useful collaboration tool for internal communication within an organization. However, there are still some loopholes left that trouble the users. Nowadays it’s difficult for users to move SharePoint list from one site to another due to several complexities, as shown in this screenshot.
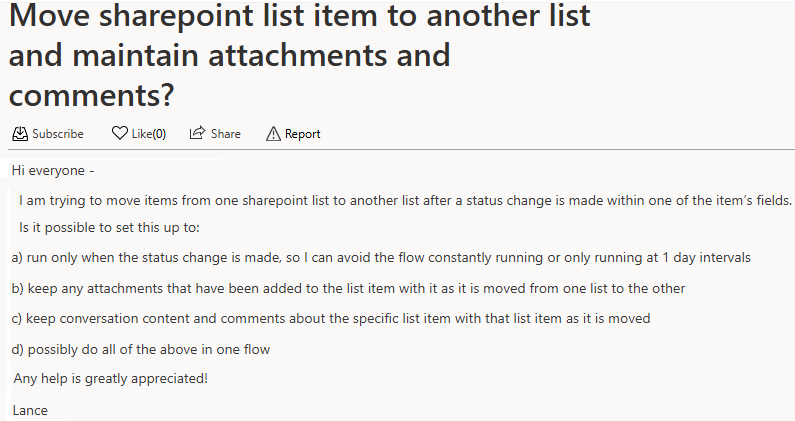
Source: Microsoft Forums
Therefore, in this informative guide, we are going to explain all seven possible solutions including the PowerShell method that several users are not even aware of. Let’s begin!
Explore How to Move SharePoint List to Another Site with Ease!
The following sections describe the best possible solutions to move the SharePoint list data to another site efficiently. One of the finest solutions we are going to learn first i.e.
#Approach 1. Reliable & Expert Recommended Automated Solution
If you want to get a hassle-free solution to move SharePoint list from one site to another, then forget about the manual solutions. Simply download the best-in-class Sharepoint Online Migration Tool as experts suggest that an automated solution is better than a manual in terms of data security, accuracy, efficiency as well as effectiveness.
This tool simplifies the migration process by automating many of the complex tasks involved, such as mapping source and destination lists. Its user-friendly interface and advanced features, make it easy for organizations to migrate their SharePoint lists to new sites.
Below are some exceptional features of this utility –
- This solution preserves metadata throughout the transition, which is not possible with a manual solution.
- With this, you can’t only move SharePoint list from one site to another but –
- SharePoint site data to another site
- Document library to another document library
- Subsite to Subsite migration
- For larger data, it offers a Batch Migration option to do the job in min.
- For recently arrived data, one can use its Delta Migration feature, which saves time.
- After the completion of the transition, it provides a precise report which helps to find out the success rate of the task.
Follow the Stepwise instructions of this Software
Now, it’s time to learn how to use this utility –
Step 1. Launch the utility on your system.

Step 2. Select Office 365 as both your source and destination.

Step 3. Scroll down to the SharePoint Sites option & check the box of lists.

Step 4. Optionally, set a date filter for your migration.

Step 5. Provide admin-level credentials for source and target validation.

Step 6. Map users & sites using Fetch, CSV, or a template.

Step 7. Review the preview and hit the Start button.

#Approach 2. Template Method to Move SharePoint List from One Site to Another
We can consider this as the most appropriate method but only in the category of manual solution. This solution involves the simple concept of saving the list as a template & then exporting it to another site.
Before you begin the process, make sure you are aware of the SharePoint Online migration best practices in depth. Follow the below steps carefully to get the desired results:
Step-1. Save Template
- Login to your SharePoint account & Navigate to the List Settings pane.
- Now from here, Go to the Permissions & Management section.
- Click on the Save List as Template option here.
Step-2. Move SharePoint List from One Site to Another by Exporting it!
- Click on the Site Settings at the top level site of the site collection.
- Navigate to the Galleries & Click on the List Template option.
- Go to List Template Gallery & Select your desired List here.
- Now Click on the Download a Copy option to proceed.
Step-3. Uploading List
With the .stp file you’re having, simply go to the Site Collection where you want to transfer the list ultimately.
- Click Site Settings >> Galleries >> List Templates
- Click Documents Tab >> Now Upload Documents
- Go to Choose File >> Browse and Select .stp File
- Finally, Click on the OK button to finish the Task
#Approach 3. Learn the New List Method for Small Sites!
A few weeks ago, one user emailed me his problem & asked for a solution regarding the same problem. However, his request was a bit different because of this statement in his email:
“Can you move SharePoint list from one site to another without complex methods if the list is small in size?”
Well, the answer is YES.
There is an easy solution for users to get the desired results that they can perform in the case of small-size lists. However, this trick won’t work in case the list is way too big. Follow the easy steps mentioned below:
- Login to SharePoint Online & Go to the Site where you want to migrate the List.
- Click on the New Button to Select the List Tab.
- Choose the From Existing List option in the prompt screen.
- Select the List you want to save on this Site & Click on the Next button.
That’s it, your files are migrated successfully. Now, let’s move on to another solution.
#Approach 4. Use PowerShell Method to Move SharePoint List from One Site to Another
Now if users are very proficient in SharePoint technicalities as well as PowerShell Scripts, then they can opt for the PSH method as well. However, this method contains several complexities for SharePoint Online migrate list to another Site in the process.
Prerequisites:
- Create a separate list first in the destination site, and make sure that both Lists have the same columns.
- Make sure that you run PowerShell as an administrator to avoid any permission barriers.
Modify the configuration variables mentioned in the below script & run it in PowerShell.
Install-Module -Name PnP.PowerShell
#Connect to the Source Site
Connect-PnPOnline -Url https://[entertenantname].sharepoint.com/sites/[name of source site] -Interactive
#Create the Template to move SharePoint list from one site to another
Get-PnPSiteTemplate -Out C:\Temp\Lists.xml -ListsToExtract “List A”, “List B” -Handlers Lists
Get the List Data
Add-PnPDataRowsToSiteTemplate -Path C:\Temp\Lists.xml -List “List A”
Add-PnPDataRowsToSiteTemplate -Path C:\Temp\Lists.xml -List “List B”
#Connect to Target Site
Connect-PnPOnline -Url https://[entertenantname].sharepoint.com/sites/[name of destination site] -Interactive
#Apply the Template
Invoke-PnPSiteTemplate -Path “C:\Temp\Lists.xml”
Here, the above command is useful where the Lists do not have any attachments. In case your Lists have attachments, then run the following command:
#Function to copy attachments between list items
Function Copy-SPOAttachments()
{
param
(
[Parameter(Mandatory=$true)] [Microsoft.SharePoint.Client.ListItem] $SourceItem,
[Parameter(Mandatory=$true)] [Microsoft.SharePoint.Client.ListItem] $DestinationItem
)
Try {
#Get All Attachments from Source list items
$Attachments = Get-PnPProperty -ClientObject $SourceItem -Property “AttachmentFiles”
$Attachments | ForEach-Object {
#Download the Attachment to the Temp
$File = Get-PnPFile -Connection $SourceConn -Url $_.ServerRelativeUrl -FileName $_.FileName -Path $Env:TEMP -AsFile -force
#Add Attachment to Destination List Item
$FileStream = New-Object IO.FileStream(($Env:TEMP+”\”+$_.FileName),[System.IO.FileMode]::Open)
$AttachmentInfo = New-Object -TypeName Microsoft.SharePoint.Client.AttachmentCreationInformation
$AttachmentInfo.FileName = $_.FileName
$AttachmentInfo.ContentStream = $FileStream
$AttachFile = $DestinationItem.AttachmentFiles.Add($AttachmentInfo)
Invoke-PnPQuery -Connection $DestinationConn
#Delete the Temporary File
Remove-Item -Path $Env:TEMP\$($_.FileName) -Force
}
}
Catch {
write-host -f Red “Error Copying Attachments:” $_.Exception.Message
}
}
#Function to move SharePoint list from one site to another
Function Copy-SPOListItems()
{
param
(
[Parameter(Mandatory=$true)] [Microsoft.SharePoint.Client.List] $SourceList,
[Parameter(Mandatory=$true)] [Microsoft.SharePoint.Client.List] $DestinationList
)
Try {
#Get All Items from the Source List in batches
Write-Progress -Activity “Reading Source…” -Status “Getting Items from Source List. Please wait…”
$SourceListItems = Get-PnPListItem -List $SourceList -PageSize 500 -Connection $SourceConn
$SourceListItemsCount= $SourceListItems.count
Write-host “Total Number of Items Found:”$SourceListItemsCount
#Get fields to Update from the Source List – Skip Read-only, hidden fields, content type, and attachments to move SharePoint list from one site to another efficiently
$SourceListFields = Get-PnPField -List $SourceList -Connection $SourceConn | Where { (-Not ($_.ReadOnlyField)) -and (-Not ($_.Hidden)) -and ($_.InternalName -ne “ContentType”) -and ($_.InternalName -ne “Attachments”) }
#Loop through each item in the source and Get column values, add them to Destination
[int]$Counter = 1
ForEach($SourceItem in $SourceListItems)
{
$ItemValue = @{}
#Map each field from source list to Destination list
Foreach($SourceField in $SourceListFields)
{
#Check if the Field value is not Null
If($SourceItem[$SourceField.InternalName] -ne $Null)
{
#Handle Special Fields
$FieldType = $SourceField.TypeAsString
If($FieldType -eq “User” -or $FieldType -eq “UserMulti”) #People Picker Field
{
$PeoplePickerValues = $SourceItem[$SourceField.InternalName] | ForEach-Object { $_.Email}
$ItemValue.add($SourceField.InternalName,$PeoplePickerValues)
}
ElseIf($FieldType -eq “Lookup” -or $FieldType -eq “LookupMulti”) # Lookup Field
{
$LookupIDs = $SourceItem[$SourceField.InternalName] | ForEach-Object { $_.LookupID.ToString()}
$ItemValue.add($SourceField.InternalName,$LookupIDs)
}
ElseIf($FieldType -eq “URL”) #Hyperlink
{
$URL = $SourceItem[$SourceField.InternalName].URL
$Description = $SourceItem[$SourceField.InternalName].Description
$ItemValue.add($SourceField.InternalName,”$URL, $Description”)
}
ElseIf($FieldType -eq “TaxonomyFieldType” -or $FieldType -eq “TaxonomyFieldTypeMulti”) #MMS
{
$TermGUIDs = $SourceItem[$SourceField.InternalName] | ForEach-Object { $_.TermGuid.ToString()}
$ItemValue.add($SourceField.InternalName,$TermGUIDs)
}
Else
{
#Get Source Field Value and add to Hashtable
$ItemValue.add($SourceField.InternalName,$SourceItem[$SourceField.InternalName])
}
}
}
#Copy Created by, Modified by, Created, Modified Metadata values
$ItemValue.add(“Created”, $SourceItem[“Created”]);
$ItemValue.add(“Modified”, $SourceItem[“Modified”]);
$ItemValue.add(“Author”, $SourceItem[“Author”].Email);
$ItemValue.add(“Editor”, $SourceItem[“Editor”].Email);
Write-Progress -Activity “Copying List Items:” -Status “Copying Item ID ‘$($SourceItem.Id)’ from Source List ($($Counter) of $($SourceListItemsCount))” -PercentComplete (($Counter / $SourceListItemsCount) * 100)
#Copy column value from Source to Destination
$NewItem = Add-PnPListItem -List $DestinationList -Values $ItemValue
#Copy Attachments
Copy-SPOAttachments -SourceItem $SourceItem -DestinationItem $NewItem
Write-Host “Copied Item ID from Source to Destination List:$($SourceItem.Id) ($($Counter) of $($SourceListItemsCount))”
$Counter++
}
}
Catch {
Write-host -f Red “Error:” $_.Exception.Message
}
}
#Set Parameters
$SourceSiteURL = “https://[tenantnamehere].sharepoint.com/sites/[sitenamehere]”
$SourceListName = “[listnamehere]”
$DestinationSiteURL = “https://[tenantnamehere].sharepoint.com/sites/[sitenamehere]”
$DestinationListName = “[listnamehere]”
#Connect to Source and destination sites
$SourceConn = Connect-PnPOnline -Url $SourceSiteURL -Interactive -ReturnConnection
$SourceList = Get-PnPList -Identity $SourceListName -Connection $SourceConn
$DestinationConn = Connect-PnPOnline -Url $DestinationSiteURL -Interactive -ReturnConnection
$DestinationList = Get-PnPList -Identity $DestinationListName -Connection $DestinationConn
#Call the Function to Copy List Items between Lists
Copy-SPOListItems -SourceList $SourceList -DestinationList $DestinationList
#Approach 5. Export/Import Process of SharePoint List Migration
This technique is tricky but effective to move SharePoint list from one site to another. First, we will export the SharePoint data into Excel & import it into the new list. Sounds lengthy! But it is not, with these guidelines –
- On the source site > My List > open the list you want to move.
- Now, export the list to an Excel file, by navigating to Export option > Export to Excel.
- Create a new list on the destination site, matching the columns in the source list. For the same > New > List is usually available under site contents.
- Next, import the data from the Excel file into the new list & save it.
- Verify and adjust the formatting to match the original list & validate the data in the migrated list.
- Test the migrated list’s functionality.
Use Cases to move SharePoint list from one site to another via this-
- Migrate project task lists from one SharePoint site to another.
- Transfer HR records from department sites to the central SharePoint site.
- Move customer data from regional sites to a central repository.
Related article – Move Files from One Teams Channel to Another
#Approach 6. Standard Method for Copying List Items Across Sites
When copying a SharePoint list, you can either perform a “soft” copy (copying the list structure without data) or a “hard” copy (including both structure and items) using the instructions listed below.
Use Cases for Soft Copy –
- Maintain consistent list formatting across sites without transferring data.
- Create reusable templates for future projects or sites within an organization.
Steps to move SharePoint list from one site to another (Using Soft Copy)
- Open the SharePoint site and navigate to More Apps.
- Select SharePoint, then choose New, and select List from the dropdown.
- In the Create a List window, choose From Existing List.
- Select the list to copy and click Next.
- Enter a unique name and choose the location (other settings like color and icon can be customized later).
- Click Create. The new list structure will appear.
Note – A “soft copy” only replicates the structure, not the data. If you need a full copy (including list items), you’ll need to use a different method.
#Approach 7. Move SharePoint List from One Site to Another Via Power Automate
Power Automate helps us to automate workflows by connecting SharePoint sites and quickly moving the data whether it is large or small volume.
Use Cases for Power Automate –
- Move completed tasks from an active list to an archive.
- Transfer customer support tickets marked as resolved to a separate list.
- Archive content in lists that no longer need to be active.
Steps –
- Create an automated flow with the trigger “When an item is created or modified.”
- Select the source SharePoint site and list.
- Add a condition to check if the “Collected” column equals “YES.”
- In the “If yes” branch, use the “Create item” action to add the item to the target list, mapping the fields.
- Add the “Delete item” action to remove the item from the source list after archiving.
- Save and test the flow to ensure it works correctly.
Our other related content – Transfer OneDrive for Business to Another Account
Manual Vs Modern Solutions – Which One Is Better?
As we solved the user query “Can you move a SharePoint List from one Site to another”, it’s time to understand which of the solutions is worth trying. So, let’s discuss a few words for both solutions. Here, are the manual solutions & the automated solution. This way users can decide to select the most appropriate solution to move SharePoint list from one site to another.
| # | Feature | Manual Methods | Automated Method |
|---|---|---|---|
| 1 | Suitability | Manual solutions are easy to use only for small-size lists. | Suitable for both large and small operations. |
| 2 | Risk & Complexity | The PowerShell method is risky due to its complex commands. | Automated solutions are the safest and easiest to use. |
| 3 | Cost | Free to use with a SharePoint subscription. | Paid solution but comes at a very decent price & free demo considering the features and safety it offers. |
| 4 | Data Security | No guarantee of data security; if something goes wrong, data could be lost. | It ensures data security, protecting your data throughout the migration. |
| 5 | Features | Limited features; the manual method performs the task but lacks many advanced functionalities. | Comes with plenty of features, including batch migration, selective migration, and delta migration. |
| 6 | Post-Migration Support | Manual methods offer limited post-migration support. Errors are harder to resolve manually. | The mentioned automated solution provides detailed reports and 24/7 support in every region. |
So, with a clear understanding of the options, it’s time to take action. Select any of them and move forward with confidence!
What are the Common Issues during List Migration – How to Resolve?
After or before the transition, some users face some hurdles and don’t how to fix those errors. We understand these pain points, and here we discuss some of them with accurate solutions to resolve:
| # | Issue | Solution |
|---|---|---|
| 1 | Data Loss or Corruption | Backup data before migration and validate using trusted tools. |
| 2 | Complex List Structures & Customizations | Use tools supporting customizations, or manually adjust post-migration. |
| 3 | Slow Migration for Large Datasets | Use batch migration and optimize network speed for efficiency. |
| 4 | Permission Issues Post-Migration | Map permissions during migration or verify and adjust post-migration. |
| 5 | Broken Links or Missing Attachments | Ensure attachments migrate and manually fix any broken links. |
| 6 | Compatibility Issues Between SharePoint Versions | Verify compatibility before migration or upgrade SharePoint versions accordingly. |
| 7 | Migration Downtime & Disruption | Plan migration during off-peak hours to minimize service disruption. |
In A Nutshell!
Finally, after discussing all seven solutions, we have concluded that the most reliable solution is an automated one. Although all four solutions work well but have their limitations.
From an organization’s point of view, users can’t afford these limitations as data is the most valuable asset in this century. Rest, as per your requirements, select any of the seven methods you like to move SharePoint list from one site to another operation.
Recently Asked Queries – SharePoint Online Move List to Another Site!
Now, it’s time to have a look at the user queries with solutions, which help you out from the hassle associated with this transition –
Q-1. How do I sync a SharePoint Online List?
Ans: Six steps to sync a SharePoint Online Lists:
- Go to Project > Choose File > Click Save button.
- Select the Sync with SharePoint option to proceed.
- Select the New SharePoint Site in Sync with the List.
- Provide a Name in the Project Name Box option.
- Add the Address of the SharePoint task List.
- Hit the Save button.
Q-2. Can I move SharePoint list from one site to another with custom columns & views?
Yes, the mentioned automated solution supports moving the SharePoint list with elements i.e. custom columns, views & settings.
Q-3. What permissions do I need to migrate a list?
You need proper Admin credentials for both the source & target platforms for this transition. If you don’t have the required credentials, then you can’t proceed with the task.
Q-4. Will my data be secure during migration?
If you use a reputable migration tool like the specified solution, your data should remain secure. However, opting for manual methods is not a wise decision, due to the risk of data loss. That‘s why before proceeding with the transition, first ensure the best practices for data security throughout the task.
Q-5. What are the best practices for post-migration?
After migration follow this checklist –
- Validate the data
- Check permissions
- Reconfigure views & workflows
- Communicate changes to users
- Regular audits
- Backup assurance
- Performance benchmarks
