How to Import Your Backupify ZIP into Microsoft Outlook Easily


“Hello, my name is Cristian Harold. I used Backupify cloud backup services to backup my Gmail accounts last year. Now I have exported my emails from Backupify as .zip file and I want to import this .zip file into Outlook 2016. The Microsoft Outlook is not providing any option to import my Backupify .zip file into Outlook directly. So, I want to know, is it possible to import exported Backupify file ? If Yes, then please help me out. Thanks in Advance!”
As we can clearly understand from the above query, Backupify provides an option to backup our cloud mails on the web. The Backupify allows us to export and save our data in the .zip file type. After extracting this .zip file you will get the email messages in a .mbox file. It means that Backupify will save all your cloud emails into the .mbox file type.
We also know Microsoft Outlook only supports .pst file type for import. So, due to different file types, you can not import Backupify .zip file into Outlook directly. But for this, you have to first convert Backupify to PST (Outlook supported data file type). So, here in this write-up, I am going to explain to you the easiest way to import your backupify .zip into Microsoft Outlook.
Steps to Import Backupify ZIP into Outlook
From the above discussion, we can easily understand that importing Backupify .zip files into Microsoft Outlook is a two-step process. In the first step, you have to export the .zip file into Outlook supported .pst file, and in the second step import the same .pst into Outlook. Here in this post, I am going to explain both the steps in detail. Follow the steps:

Step 1: – Convert Backupify ZIP to PST File Format
There are ways to convert MBOX to PST, but the best possible method is to use a trusted professional tool. MBOX Converter is the easiest way to export Backupify .zip to Outlook PST file type. It is specifically made to deal with MBOX files regardless of their origin and hence, it fully supports Backupify MBOX.
For this, the complete and step-by-step guide is listed below. Perform the steps:
- First, extract the ZIP file. You will get MBOX files. This file format stores all your backup email messages.
- Download and Install the software on your Windows system.
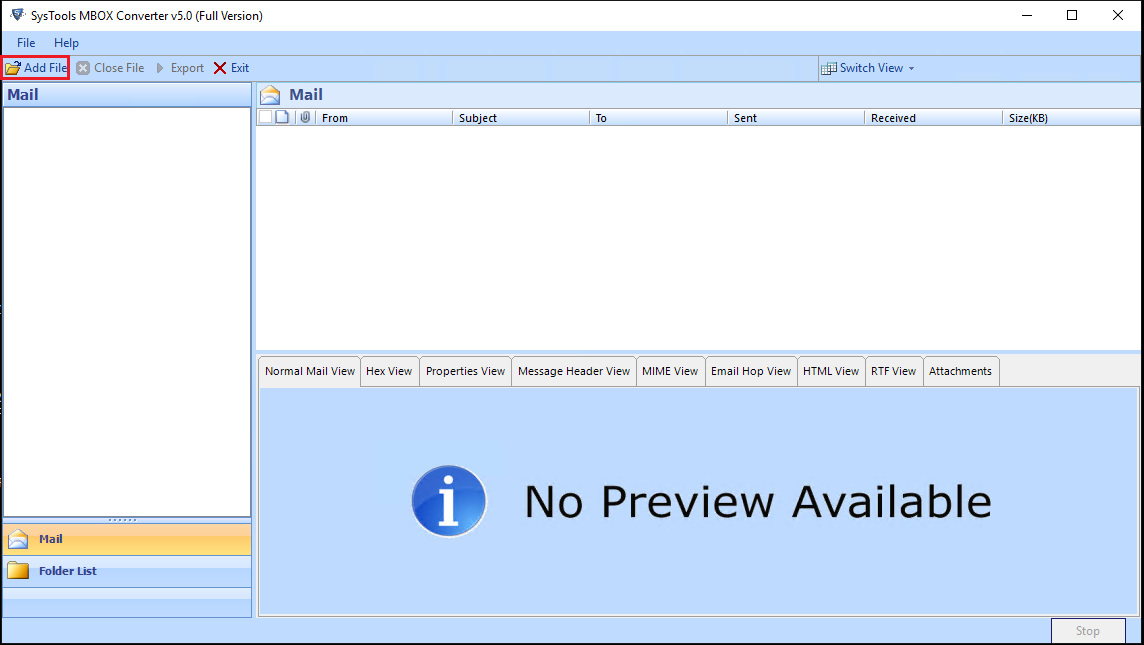
- After installing the software, the home window will appear. Here, click on Add File button from the software menu bar.
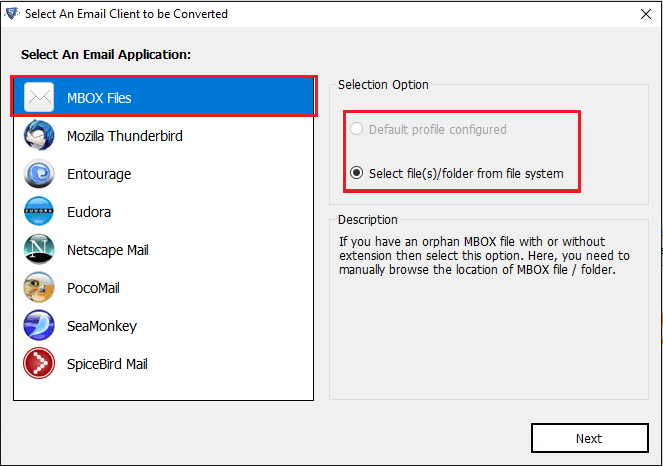
- Now, the new window will appear, here you have to select an email application. But in your case, you have to select the MBOX file option. Because you have the orphan .mbox file (unzip the backupify .zip file and you will get the .mbox file). Now click on Next button and browse the .mbox file.
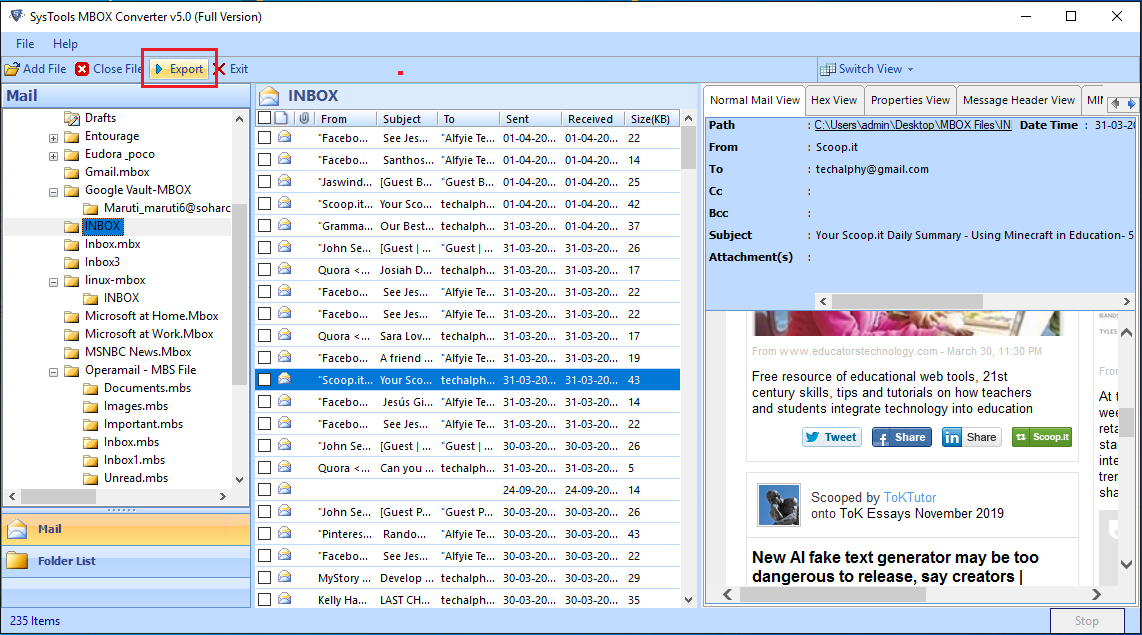
- After browsing the .mbox file, the software will provide a preview of all emails along with the attachment. You can view Message Header, Hex, MIME, HTML, RTF etc. here. Now, click on Export button from the menu bar as highlighted in the screen.
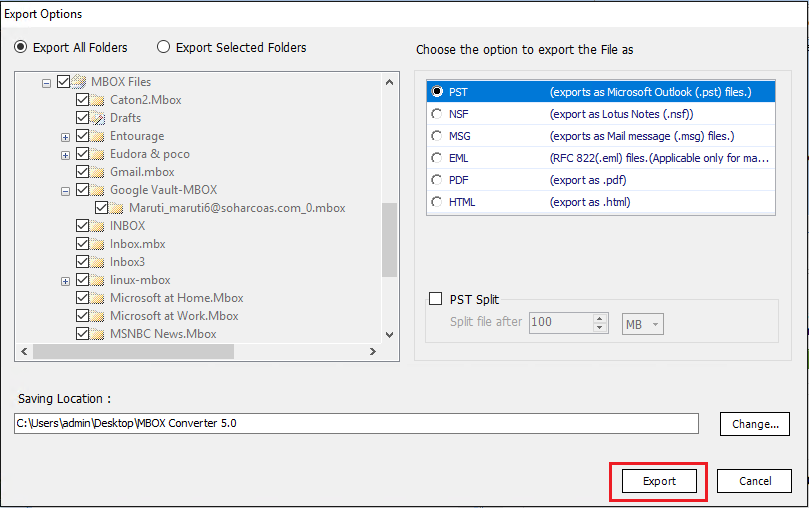
- After that, the Export Options windows will appear. Here, you can select any one file type from PST, NSF, MSG, and EML. But, in your case, select the PST file type. Because you want to import backupify .zip files into Outlook.
- Apart from this, the software also enables you to split the PST file according to your PST file size requirement. Check the checkbox, if this feature required.
- Browse the location to save the .pst file after conversion. After doing all this simply click on Export button to start the conversion process.
- After converting Backupify to PST file type, the software will show a successful message in the pop-up window.
Here, step 1 is complete. Now, move to step 2 and import the converted .pst into Microsoft Outlook.
Step 2: – Now Import PST File into Microsoft Outlook
In step 1, you have created the .pst file from your Backupify .zip file. Now, in this step, you will get a complete guide for how to import the .pst file into Outlook. The process may be slightly different for different versions of Outlook. I am taking the example of Outlook 2016 here. Perform the steps listed below:
Note: – You can import the converted .pst file into all versions of Microsoft Outlook like 2019, 2016, 2013, 2010, 2007 etc.
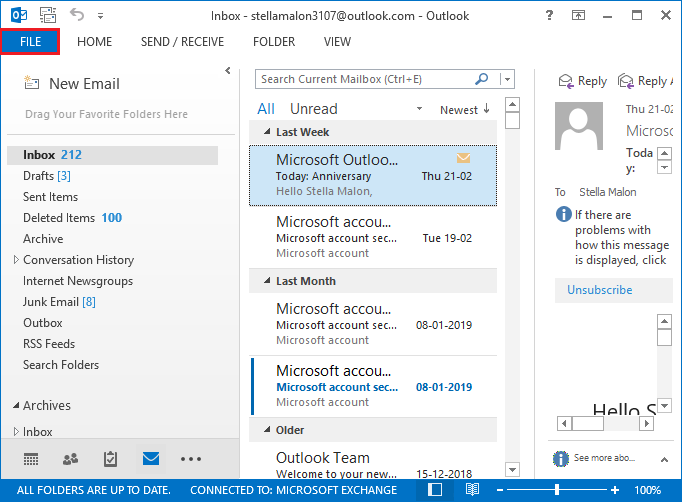
- Launch Microsoft Outlook and click on the File tab.
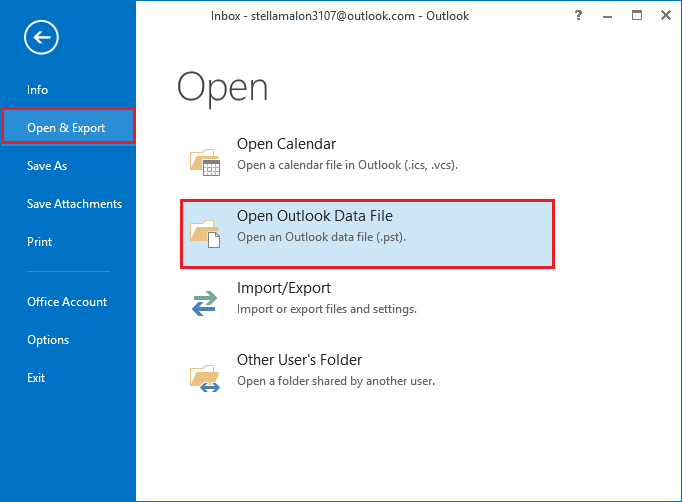
- Now click on Open & Export option from the list and after that click on Open Outlook Data File.
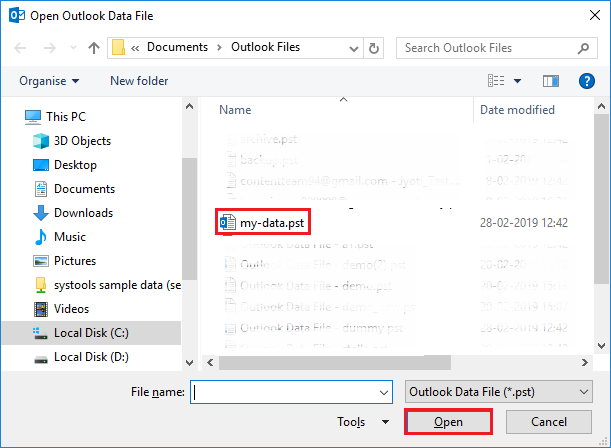
- Now select the .pst file which you have created in step 1 and click on Open.
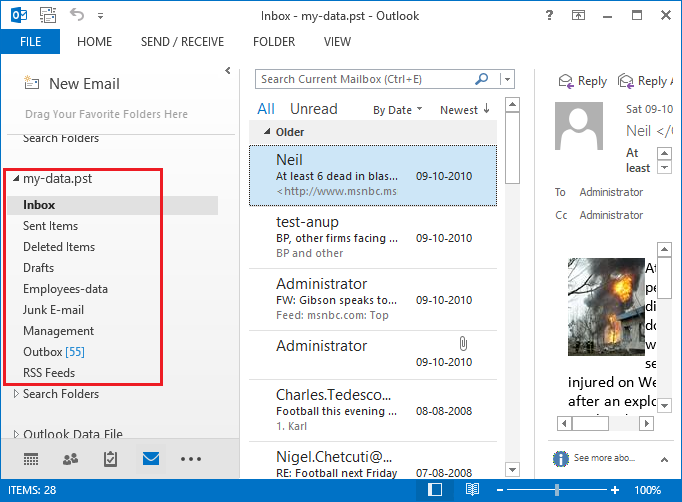
- View the imported .pst file into Outlook interface.
Final Words!
I am sure after going through all the steps listed above, your backupify .zip file is easily imported into Microsoft Outlook. The procedure explained in step 1 will convert Backupify to PST and create Unicode PST file. So, you can easily import it into Outlook 2019, 2016, 2013, 2010, 2007 and below version without any restriction. Now you can say that it is quite easy to import backupify .zip file into Outlook.

